Morristown, Parsippany, Dover, Long Valley, Roxbury, Chester, Randolph, Mendham, Rockaway Computer Service & iPhone Repair

Posts in category Tutorials

Other User account is the only option on Log in Screen in Windows Vista – Solution

Other User account is the only option on Log in Screen in Windows Vista – Solution

I had a client this week who was having issues getting into their Windows Vista installation, mainly, they were only given the option to Log into Windows Vista Home Professional with ‘Other User’.  Problem is, they never created ‘Other User’, nor did they have any idea what the password could have been for ‘Other User’.  Poking around Google yielded nothing but unanswered questions. I dug deeper, and retraced my clients steps in coming to the error they were receiving.

The Process:

The problem started with them receiving the error message:

File : \Windows\system32\config\system
Status: 0xc000014c
Info: Windows failed to load because the system registry file is missing or corrupt.

With a few searches around Google, restoring the registry to a time before it was corrupted can be done by doing a system restore through a Windows Vista Install CD or a Vista Boot Disk.  Since Most Manufacturers don’t ship new computers with the actual cd, and only put a Recovery partition onto the Hard drive, it may be hard to accomplish this task.  However, if you are able to boot into the Selective Startup (tapping F8 at computer startup), there should be a way to get into the Recovery Partition.

Once in the Recovery Partition, you should be able to do a system restore to your latest back up point.  However, make sure you choose the correct windows installation from the list of OS installations.

The problem that my client had, was that they were unaware of this option.  Instead they consulted Google and found Neosmart.net and their Vista Recovery Discs.  While these discs are a GREAT tool, they must be used with caution.  The Vista Recovery Disc is a bootable Recovery Utility.  My client, unfortunately, (incorrectly) used the Boot Repair utility found on the disc, and when they restarted after performing the ‘boot repair’, they were greeted with the Vista Login Screen, but it was only showing ‘Other User’ as an option.  This is where I received a phone call from them, and they needed help.

Issues at Hand:

When I first sat down at the computer, I immediately tried booting into Safe Mode, but nothing was coming up.  This was very intriguing to me since we have the following two symptoms;

  1. Can’t access Safe mode after a Corrupt Boot Repair
  2. Can not boot into Safe Mode or Selective Startup
  3. Cant turn off the Computer without pressing the power button on the tower (no power options are displayed at the Windows Login screen where ‘Other User’ is shown)

I booted into the Vista Repair Discs that my client had purchased and downloaded from NeoSmart.net and immediately knew what had happened.

When going into the Start up repair on the NeoSmart discs, it brought up two instances of Windows Vista.  My client had chose the wrong Instance/partition and it adjusted the MBR (master boot record) to boot into the Recovery Partition that was installed onto the machie by the Vendor.  This was the reason for ‘Other User’ popping up on the Login Screen.  This was also the reason why the Safe Mode options were coming up.

The Fix

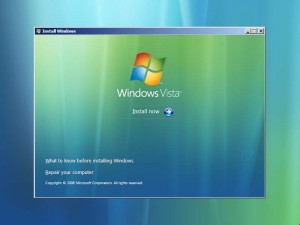
I happened to have original Vista Home Premium Installation Discs and I inserted the disc into the CD-ROM drive and booted into that disc.

  1. Once you boot into the disc, you are greeted with Vista’s Installation Menu:
  2. You need to click onto the ‘Repair your computer’ option.
  3. The next option that comes up will show System Recovery Options, where you need to select your correct installation of Windows from the list. Click next after you choose your Installation.
  4. It will attempt to repair your boot, in my case, it detected the boot problem, and told me to restart for the changes to take effect.  If you click cancel while it is Automatically trying to fix your problem, you just have to click Startup Repair from this menu:

Once my computer restarted, the correct Windows Login Screen appeared with my clients User Account front and center.  Problem Solved.


New Apple Maps integrated with Yelp

New Apple Maps integrated with Yelp

Apple sure did fall short with their Apple Maps application, but not in all aspects.

I discovered that the Apple Maps App is integrated with Yelp!

All you need to do is type what you are looking for in the search bar, followed by your city and state, and you will be given a plethora of options.

For example, type in “iPhone repair morristown nj” and you will see the map come up for my business.

Alternatives to the New iOS6 Maps Application

Alternatives to the New iOS6 Maps Application

If you are like myself, who was very much looking forward to the new Maps application, and was deeply disappointed by the Maps app, there is alternatives.  Not only is there an alternative, but it is FREE!

Apple advertised the turn by turn navigation, which is a standard on all android devices.  What actually turned out happening, was that Apple only pushed the turn by turn feature to the iPhone 4s, and the new iPhone 5.  I didn’t learn of this until after already upgrading (drag).  However, MapQuest offers a FREE turn-by-turn Application with voice navigation, and it works Great.

Bing also has an application where you can use their Maps within the app that have the birds eye view, which is very similar to Apple’s 3D maps.

Don’t be incredibly disappointed about iOS6 maps, there is a solution!  Let me know if you have heard of anything else, or if you are using another app that you recommend!


How to use your iPhone 5 & iPhone 5S/5C with older Bose Sounddock’s

How to use your iPhone 5 & iPhone 5S/5C with older Bose Sounddock’s

Update January-12-2017

The iPhone 7 and iPhone 7 plus can use the following adapters also.
I have also wrote about how you can charge and listen to music at the same time on the iPhone 7.

With the new release of the iPhone 5, iPhone 5C, iPhone 5S, iPhone 6, and iPhone 6 Plus, there are many people asking them selves “How do I make my Bose Sounddock work with my new iPhone?”

Update November 17th, 2014,

All of the links below are still applicable to make your iPhone 6, and iPhone 6 Plus work with your older Bose Sound Docks.  It is also a great way to make it work with any iHome Alarm Clock, or Stereo.

Apple’s Lightning to 30 pin adapter– Apples official cord will work, but DOES NOT provide Bluetooth capability.

CableJive dockBoss Smart Audio Input Adapter for iPod/iPhone Docks – Good for turning your Bose Dock to accept a 2.5mm headphone input. (will not work for iPhone 7)

TekuOne Wireless Bluetooth Music Receiver Adapter for Bose Sounddock – Works great for all model iPhones, as well as linking your Bose dock to your laptop, or other Bluetooth enabled devices.

Update December 2, 2013:

Given that Apple has released the iPhone 5S, and iPhone 5C, I have been asked many times lately about how to accommodate them into use for older model Bose Sounddock’s without the lightening adapter.

To make your iPhone 5, 5S, 5C, and iPad Mini work in your older model Sounddock’s, you need to use one the following options:

Apple’s Lightning to 30 pin adapter – You can use the adapter with the longer cable for the iPad
CableJive dockBoss Smart Audio Input Adapter for iPod/iPhone Docks
Wireless Bluetooth Music Receiver Adapter for Bose Sounddock


UPDATE 11/29: New Bose SoundDock 3 will be coming out any day now, to be here for the holidays.  Also, I have evaluated and can confirm the functionality of Apple’s Lightning to 30 pin adapters with the SoundDock speaker products. I recommend using the 0.2 meter “cable” style adapter to prevent potential IR remote control issues.

UPDATE 10/22: I have heard reports from many people that the Lightning adapter is only charging and not playing music.  At the moment, the only confirmed way for music to play through your Bose Sounddock on the iPhone 5 is with a CableJive dockBoss Smart Audio Input Adapter for iPod/iPhone Docks.  If you want to spend the extra few bucks, you can also pick up a Wireless Bluetooth Music Receiver Adapter for Bose Sounddock for less than $40.  Both of those adapters will work with all types of docks, not just the Bose Sounddock (iHome and others).

If you have never purchased a Bose Sounddock, and are looking for something immediately, you can pick up a SoundLink Bluetooth Mobile Speaker II. This Bluetooth Bose speaker allows you to play music through your iPhone, Computer, and any other device that has Bluetooth capabilities.

In theory, to make this work, you are going to need the Apple Lightning to 30-pin Adapter.  Apple has them for sale for $29.00.  Simply take the adapter, place it into your dock, and put your iPhone 5 into the adapter.  There is no confirmation from Apple or Bose as to there being Audio out, though it will most likely be good to charge your iPhone 5 if nothing else.  They have noted on their website

*Some 30-pin accessories are not supported.

There is somewhat conflicting information going around whether or not there the Bose Sounddock will play music from the iPhone 5.  Apple also noted on their website that there is “Support for analog audio output, USB audio, as well as syncing and charging. Video output not supported.”

The net-net: No one really knows for sure, but as soon as Apple starts shipping the 30-pin to Lightning Adapters, I will keep you updated.

Apple is not shipping until October due to supply problems, so for the time being, you are going to have to make due without bumping your music from the iPhone 5.

It has been noted that the knock-off models of this adapter will not work due to Apple requiring an authentication chip.  Be leery of the adapters that are selling on Amazon and eBay not made by Apple as they most likely do not have the authentication chip required by Apple.


DLNA Media Center Setup

DLNA Media Center Setup

It all started for me back in high school.  I had a huge movie and music collection (20GB of music, 300+ movies) stored on an external hard drive.  Anytime I wanted to watch one of my movies, or listen to music, I’d have to hook up the external hard drive to my computer, copy over the movie or music, and put it on a USB drive.  I’d then have to take said USB drive and plug it into my PS3 or XBOX 360 to be able to watch or listen to my media.

While in college, I had built myself a machine that used my TV as a monitor so that I could watch my movies that way.  That solution will not work now that I don’t want my computer sitting in my living room next to my TV.

I had researched many different DLNA media servers that I could use; many were free, few had a price tag.  My requirements were that it needed to stream to my Sony PlayStation 3 in my bed room, my Microsoft Xbox 360 in the family room, and my iPhone for where ever I wanted to be in my house – price didn’t matter.

I found a program called Mezzmo that offered these solutions.  Mezzmo automatically finds and organizes all your music, movies and photos on your computer and imports music, movies, photos and playlists from your iTunes, and anywhere else that you specify in the program.  Media format support includes all popular video file formats, music file formats and image file formats.  You can even connect and stream to multiple devices at the same time- which was a huge plus to me because I have more than one device in my house. Mezzmo transcodes music, movies and photos on-the-fly so they play perfectly on your DLNA-enabled device such as the PS3 or XBOX 360.  I personally chose the option within Mezzmo to pre-transcode all your files before you stream them, preventing any buffering or synchronization issues that can associated with transcoding files on-the-fly.

Not only does Mezzmo organize your media files, it has the ability to provide each of your devices with thumbnails of the movies and pictures.

Mezzmo is ready to run and start being your media center with just installing, adding and processing media, and starting the server.  Once the server is started and it has processed all your files, fire up your PS3 or XBOX360 and you will see your Server as a video source in the menu of your device.

Check out Mezzmo here – the cost is $29.95, but worth every single penny!

Error 3004 when updating to iOS6

Error 3004 when updating to iOS6

I’m sure I am not the only one having this issue, but have yet to find anyone reporting it online.  I was receiving Error 3004 when upgrading to iOS6.

This can mean a few things:

  • Apple’s servers are swamped due to the rush of people looking to upgrade; try it again in a few minutes.
  • You are using an outdated version of iTunes.  This was my issue.  Although iTunes prompted me to upgrade my phone and let me download iOS6, when the progress got all the way to the end, it failed the upgrade.  As soon as I updated iTunes to version 10.7, I was able to successfully upgrade to iOS6.

Another error I received: “( ERROR ) An unknown error occurred (6)

  • This one actually stumped me, and got me stuck in recovery mode.  I made sure my hosts file wasn’t blocking Apple’s servers (through TinyUmbrella; sometimes the Hosts file is set to use cydia’s host)
    • That wasn’t it
  • I was upgrading from a jailbroken iOS 5.1.1 – Every time a New OS comes out, it is always in your best interest to do a full restore.
    • As soon as I did the full restore, I was able to get it working.


Updates on iOS 6 Jailbreak

Updates on iOS 6 Jailbreak

With iOS6 launching just says away, there is much anticipation for a jailbreak for iOS6. As of right now, iOS6 GM is able to be jailbroken via a tethered jailbreak. It is a good sign for the device down the road as far as a fully untethered jailbreak, but it certainly won’t be available for when the device launches.

A couple of things I recommend prior to the iOS6 launch:

  1. Backup your SHSH for your phone, using TinyUmbrella
    • If you decide to upgrade to iOS to see all of the new features, but you decide you want to downgrade to iOS 5.1.1, having your SHSH keys backed up is the only way you will be able to accomplish this.
  2. Decide whether or not the features of iOS6 are worth giving up those from your jailbroken iOS5.
    • Those new features in iOS 6 include: Passbook, Facetime over 3G, Updated Phone App, Updated Mail App, Updated Safari App, New Apple Maps, Facebook Integration and much more.

Replacing the Hard Drive in Macbook Pro

Replacing the Hard Drive in Macbook Pro

I wanted to update to replace the hard drive on my Early 2011 Macbook Pro.  Since I have had my computer for over a year, my drive was getting bottled down, and I only had about 40GB left.  Most of the space was filled with videos from my GoPro, pictures, and my extensive music colleciton, and I wasn’t willing to part with any of it.

I decided to go with the Western Digital 320 GB Scorpio Black SATA Notebook Hard Drive – WD3200BEKT from Amazon.  It was an affordable drive, with very good reviews.

There are plenty of guides on how to replace the hard drive on an early 2011 Macbook pro online.  My problem came when I was reinstalling OS X.  The version of Snow Leopard I was installing was 10.6.7.  When I went to boot from the DVD, my Macbook was emanating 3 POST beeps.  The 3 beeps indicate an issue with the memory (RAM), which I had recently upgraded by purchasing 2x 4GB RAM chips.  However, I hadn’t touched the RAM, and it was working perfectly fine before I touched the hard drive.  Upon further research, the 3 Beeps on start up on my Macbook Pro from early 2011 indicated that I was using an install DVD that was not supported on my Machine.  I ended up digging out the box that I got back in early 2011 and pulled out the install DVD that came with the computer.  It was version 10.6.6, and after booting into that by holding Command + C at startup, it went right into the installation process.  The installation took about 50 minutes, and my Macbook was running just like new, if not faster (due to the upgraded RAM and a fresh HDD).

The great thing about my MacBook Pro is that I can still boot into my original hard drive.  I picked up a Macally PHRS-250CC FireWire 400/USB2.0 External Storage Enclosure for 2.5″ SATA HDD and all I need to do to access my old OS X installation is hold the option key at startup, and select my Firewire hard drive from the list.

Using the new Outlook.com with your Gmail

Using the new Outlook.com with your Gmail

Microsoft has released their new version of Outlook.com today.  Their goal according to them was to have a modern and fast UI.  If you take a look at the new outlook.com (link), you can see, it has a very modern look, very much like that of the Windows Phone, and the new Windows 8 OS.  They also designed the new outlook so you, the user, can easily be connected to your social networks (Facebook, Twitter, LinkedIn, Google, and soon, Skype).  They have also included smart tools to manage and filter messages.  Another important point they brought up, was that they are prioritizing your privacy.  In other words, they don’t serve ads based on the contents of your email, like their competitor Gmail does.

I went ahead and signed up for a new e-mail address to see what all the hype was about.  After creating an account from here, you are automatically logged into the new interface.

The left hand navigation shows your folders and quick view choices.  On the right, you are presented with your ads.  In my case, they are all items somewhat relevant to my recent searches.  Microsoft said they are not using the context of your e-mails to base their ads off of, but they are definitely using some sort of cookie from your browsing through their site.

The new Outlook.com Preview is encouraging Gmail users to make the switch to their service, or at least forward their e-mail to their new Outlook.com address.  Switching is as easy as setting up forwarding in Gmail, and you can also POP all your old mail into your new account.

On this page you will need to click on the ‘Add Forwarding Address’ box at the very top of the page.  It prompts you with this box:

Enter your new Outlook.com e-mail address into the box and your e-mail will now be forwarded.  There are a few other options I have selected, such as only forwarding new e-mail that comes in, and not all my old messages.  I also have it storing a copy of all my Gmail e-mails in Gmail, just in case.

The last step I am going to do, is import my contacts from Gmail into my new Outlook.com account.

From that page, you need to select Google contacts.

The following box will pop-up:


You need to grant Outlook.com access to your Gmail account (click connect).

Since I was already signed into my Gmail account, I was prompted with this box to authorize the access into my Google contacts.  Click on allow access and you will have all of your google contacts into your new Outlook.com account.

Downsides

There are a few downsides, a major one is that there is no IMAP support yet.  According to the new Outlook.com support team, they are are planning on adding it eventually.

Adding Network Printer to Windows 7 Computer

Adding Network Printer to Windows 7 Computer

This one has been particularly frustrating for me.  There is not many computer problems that I walk away from, and this was one of them. In this particular instance, I had a client that used Fed-Ex Shipping Manager and needed the printer (Model Zebra ZP500 ZPL) to work over the network on a work-station machine that was running Windows 7. These printers aren’t cheap, so this is the most cost effective way of making it happen.

When going through the “Add Printer” Wizard on the Windows 7 machine, the printer was discovered on the network, but no matter what, it would not install, citing incompatible drivers as the reason.  Even after trying to install the drivers I downloaded from Fed-Ex’s website, I was still getting an error.   It appeared that the Windows XP machine was only supplying the Windows XP drivers to my Windows 7 machine, which obviously won’t work and the Windows 7 printer wizard wasn’t giving me a chance to browse and provide it with my own printer drivers.

I was stumped!

When I tried to install this printer when I connected it directly via a USB cable, it worked with no problems, first try.

Hmmmm….

I knew what needed to be done!  I was going to install the printer on the Windows 7 workstation by plugging it in via USB and changing the port that it used to a network port.

  • Through the ‘Devices and Printer” folder, find the printer you are working with, right click on it and go to ‘Printer Properties”
  • Click on the ‘Ports Tab’ and then click on the button that says “Add Port” and it will bring up the following menu
  • Click on “New Port..”  Make sure you click that as opposed to “New Port Type..)
  • You will be presented with this screen.  Here is where you will put the network location of the printer.  In this example, the network PC is called ‘officepc’ and the printer that is shared on that computer is called ‘zebraprinter’.
  • If  the following error is displayed, it means you typed in the shared computer name and/or printer name incorrect.  Make sure you are connected to the network, and the network PC is accessible.

In my case, it worked, I hit apply, OK, and did a test print.  Viola, a successful Zebra ZP500 Network Installation on Windows 7 Machine.

Find Us on Yelp!